Amanda’s Easy Peesy Flooring
Do you have old flooring you would just love to get rid of without a ton of labor? I have a friend that wanted to fix up a rental and found a really wonderful solution that is not too labor intensive or break your wallet.
The nice part about this flooring is that you can do it yourself. It is water resistant so it is perfect for Kitchen or bath areas. It can be used over existing linoleum and it does not require anything under it, or adhesive. So the only cost you incur is the floor only.
Another note is that the flooring you will see in the pictures is a special order but there are standard colors in stock at the local hardware stores.
What you will need:
A small square and a large square
Box cutter
36” Straight edge or yard stick.
Marker/pencil
To begin; remove your baseboard molding unless you are able to slide you’re flooring underneath the existing molding and not leave a gap between the molding and the new floor. Most likely you will need to remove your molding.
Take into account which way you would like to lay it. Look for the way that would take the least amount of cutting. Also take a Square and use it in one of the corners to see how square the room is. Simply take your large square and put it in the corner. If you do not have more than a 1/8” gap between the wall and your square, you will be all set. Start in the best corner. You can always trim a bit off if needed. Keep in mind that if you have removed your molding it gives you some room for adjustments.
Make sure the area that you will be working in is nice and clean. If you have torn out carpet make sure you do not have any staples or nails sticking out of the floor. I have found some nails that have popped up out of the floor so I removed them and replaced them with a #8 deck screw.
This flooring comes in 5” wide x 36” long strips. It is packaged with a paper in between each tile so that the sticky edges do not touch.
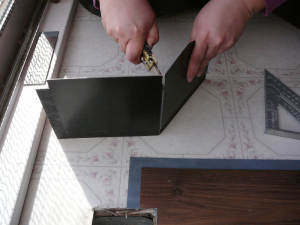
Begin by cutting the sticky edge off.
-
If you are working from right to left you want to trim the left side.
-
If you are working left to right, you want to trim the right side off.
In other words, trim the first edge near the wall.
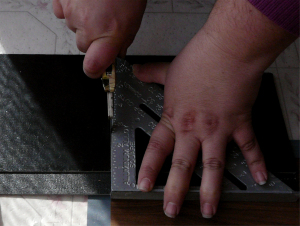
How to trim: score a line with your utility knife; then bend till it cracks; then take your knife to finalize the cut as seen in the pictures below.
This is so simple to do so don’t feel intimidated by it. If you cut it wrong save the piece; put it aside. Try a new piece.
Tip: Do not throw any pieces away. No matter how large or small, you may find an area to use them in. For instance: Closest areas are great for pieces that were not cut correctly. Or a thin strip may finish a row in the room.
Lay the first cut piece in the corner and then attach your second piece by holding it on a 45 degree angle and lining the seams up. Then slowly lay it down, adhering one edge to the other. Smooth it over with your hand to make sure the two pieces stick.
Tip: These do not come apart very easily once they adhere, so take your time and make sure your edges line up very neatly. Cut the final piece of the row and use the left over for the beginning of the next row. This will cut down on the amount of scrap and also gives you a nice natural staggered look.
Usually the first row will tell you if your room is square or not. This is a great double check.
On to the next rows! Here are a few pictures demonstrating how easy it is to put this in place. Notice hand placement and angle as I am putting this in.
This is truly an easy project for any beginner! We were able to put in about 350 square feet in just 6 hours or so. That is with some prep work included.
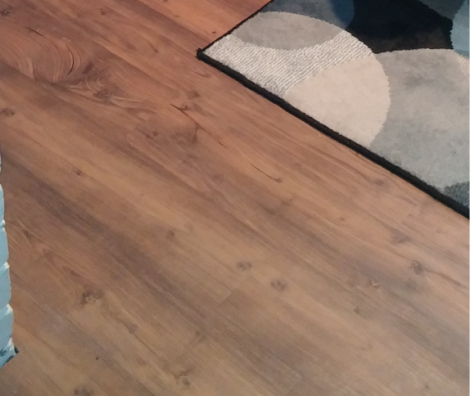
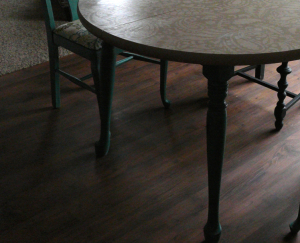 The beauty of it is they actually suggest using it over linoleum and sub flooring. We used it in Amanda’s rental on both types of flooring. Upstairs we covered sub flooring and in the kitchen and dining area we covered over the old linoleum you see in the first pictures. It worked out perfectly. And if there were any waves in the floor, or inconsistency in the sub floor, it is completely unnoticeable once you are finished. It is perfect for hiding any imperfections!
I hope this really inspires you! It certainly did me and it was easy and fun! I thoroughly enjoyed helping Amanda. Thanks Amanda for sharing.
Keep on Creating!
Mischele

I saw this and had to comment! I am a big big fan of the Allure Trafficmaster plank flooring myself! People come in our house and can’t believe that our floors are not hard wood. It was a lot of work for me to put down (my husband and I worked together and we are both disabled) but we did it and all of our house except two bedrooms where we left good carpet. I like how you mentioned that it is waterproof and good for kitchen or bath. Exactly!! Now, I wonder how people can put hardwood or laminate on floors in those rooms? The way these planks stick together, I’m sure water would just lay on top of them. Great post! BTW, our floor is “hickory” style and we obviously love it! And it’s warrantied for years (I forgot how long). If someone wants a real nice looking, easy care floor (we have two dogs that run and “peel out” on th is floor all the time and it IS very durable), get this stuff, I don’t think you’ll be disappointed.
LikeLike
Thanks for the perspective Virginia! Mischele is out of town right now so I thought that I would reply for her! I’m glad to hear that you think it is so easy….I’m considering doing it in my kitchen and laundry room. Thank you for your comment…I know there are others who will benefit from this! Blessings sister!
LikeLike