Author Archives: creativefoodbymaria

About creativefoodbymaria

I am a midwestern girl that didn’t learn about the taste of extraordinary food until I moved to San Francisco. The foods of the West Coast were a revelation and I decided to learn how to recreate those tastes for my own table. Thus began my life long love affair with cooking and baking. I invite you to join me in my kitchen as I show you how to create recipes that are both simple (mostly), and delicious!

Maple Ginger Sweet Potatoes with Apples

Standard

This delicious, slow cooker recipe is a cool day delight!  Encompassing some of autumn’s favorite flavors, it is easy to put together, and thanks to a slow cooker; effortless to cook!  The rich flavors of sweet potatoes and apples meld seamlessly with the sweetness of maple and ginger, and the spices give it an almost pie-like flavor.  This is a wonderful, warming recipe that you will want to return to again and again.


Diff:  Easy    Prep:  15 min.    Cook:  4 hrs.   Serves:  6-8


Ingredients:


1 ½ # sweet potatoes, peeled & cut into bite-sized pieces (about 5 cups)

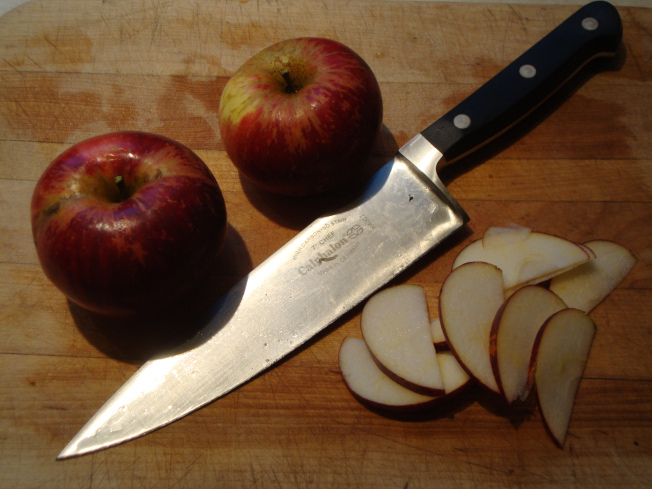
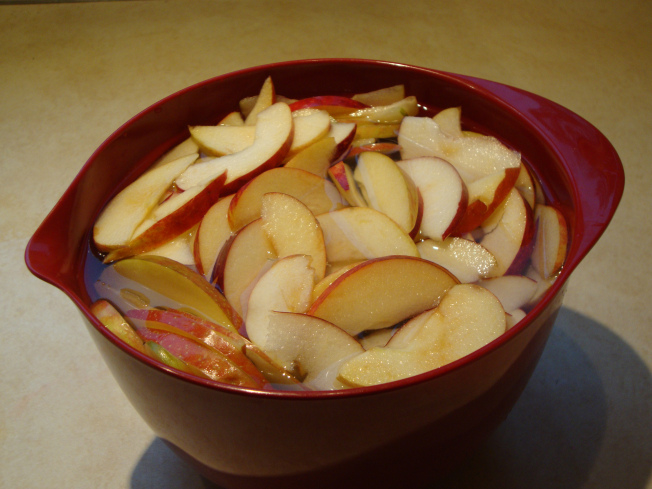
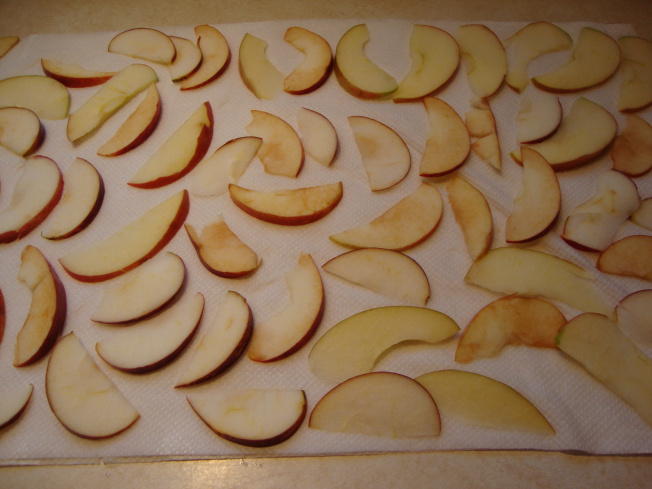
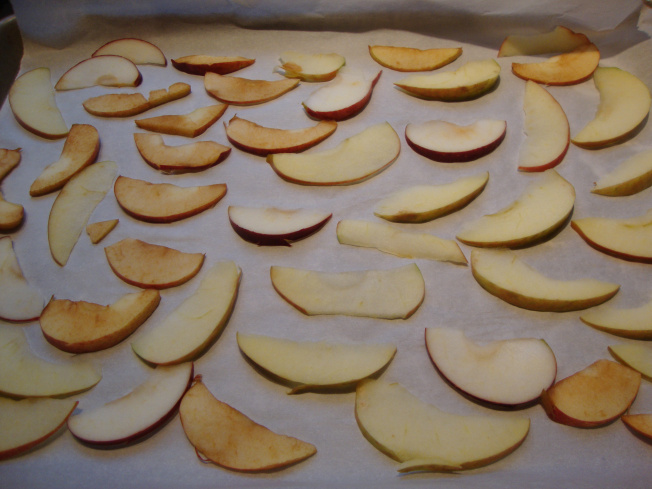
2 medium tart cooking apples, chopped

¼ c. dried cranberries

1 ½ t. grated fresh ginger

½ t. kosher salt

1/8 t. pepper

½ t. cinnamon

¼ t. nutmeg

½ c. water

¼ c. maple syrup


Directions:


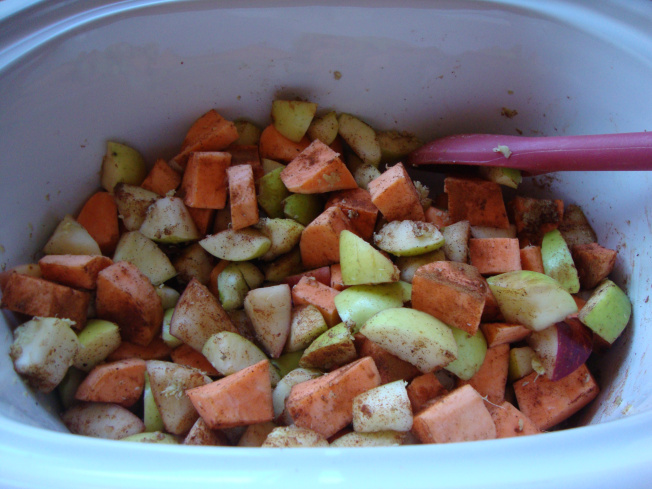
In a slow cooker, combine all ingredients except for water and syrup.

 
DSC05012

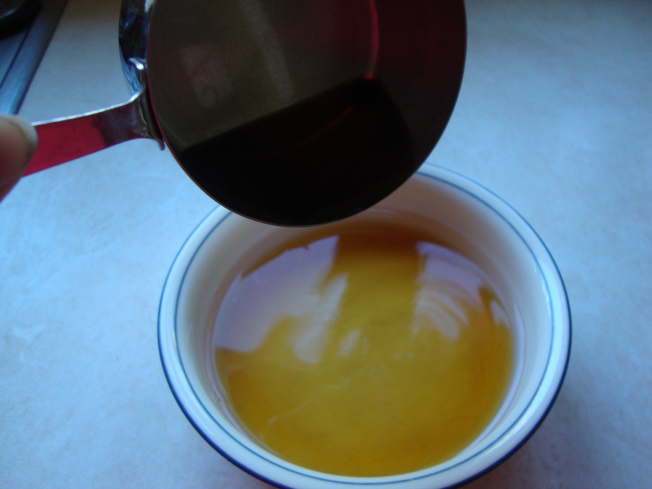
Mix syrup with water and pour over everything in slow cooker.

 
DSC05016

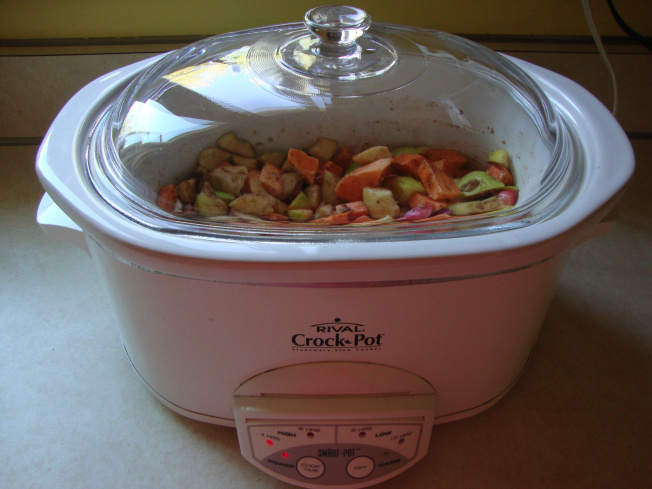
Cover and cook on low for 3-4 hours or on high for 1 ½ hours.

 
DSC05018

Enjoy!


DSC05022

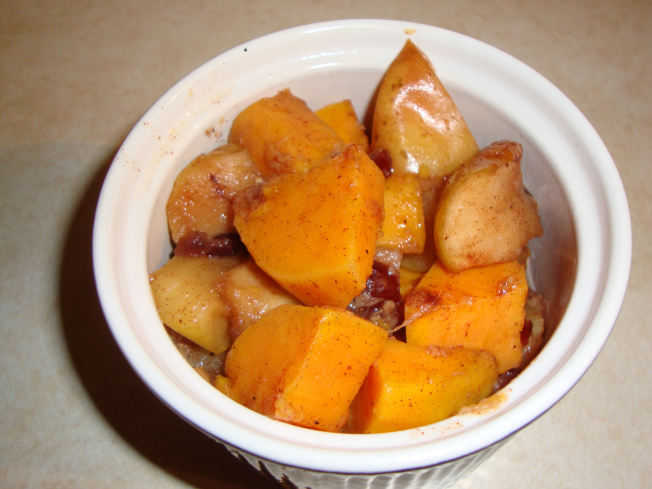
This is an excellent recipe to take to a potluck.  This could also serve as a nice side dish on a Thanksgiving table, as it’s flavors would complement many other dishes.  As well, this could be a lovely dessert served alone or with whipped cream.  I hope you and your family enjoy this dish, as my family has.


Until next week, wishing you all of God’s blessings, good health and good eating!


Smiles, Maria

Healthy Organic Dried Apple Chips

Standard

Healthy Organic Dried Apple Chips


I was recently gifted with a basket of organic apples by dear friend Lisa, the founder of abeautifullifeministry.org.  Thrilled, I took them home and quickly found numerous recipes to use them in.  This is just the first of several using these that I will feature here. 

I have always loved getting apple chips in salads when I go out to eat, so I decided to make them myself.  (Plus, have you noticed how expensive apple chips are?  Not on my food budget!)  The recipe is simple, but it takes your oven a long time to dry out the apple slices out.  I’ don’t own a food dehydrator, so yes, I had to take the oven route,  So, be sure to do this when you’re home, and have 2-5 hours to leave the oven on.  

Apple chips are healthy, low fat, and not only make a great topping for salad; they also are a healthy snack for yourself or your family. So, get your aprons on, wash up those apples, find a sharp knife and an apple corer, and let’s get going!


Diff:  Simple   Prep:  1 hr   Time:  7 hrs


Ingredients:


30 apples (any variety), washed thoroughly

1/2 c. lemon juice


Instructions:


  • Core apples.  It is not necessary to peel the apples; you will save yourself lots of time if you don’t!  (Plus, the red peel looks pretty…)


  • Slice apples thinly, 1/8 – ¼ inch.  (Thinner is better!)  You can slice them horizontally or vertically, it’s a matter of how you want them to look.

 DSC04980 

  • Preheat oven to 200°F.


  • Put slices in large bowl of water (4 cups) with ½ c. lemon juice to prevent browning. Make sure slices are covered with lemon water; I had to keep dunking mine because the slices kept floating to the top!

 DSC04982


  • After apples are sliced, drain water and press as much moisture as you can from apples using paper towels; this will speed the drying process.

DSC04983

  • Place apple slices in a single layer on baking sheets lined with parchment paper.  Oops!  Looks like a few of my apples got a little brown, those must have been the ones that were floating on the top. 

DSC04984 

  • Place baking sheets on first and third racks in oven and bake for one hour.  Turn apples and bake for one more hour, then test to see if chips are dry enough; if not, continue baking one more hour.


DSC04985

  • Turn off oven, open oven door and let cool for one to two hours.  Remove chips from oven.

 DSC04987

  • Store dried apple chips in a sealed container or plastic bag for up to a week.  If storing more than a week, store chips in refrigerator for up to one month. 


Well, this is when my camera battery ran out…so no pix of finished product before we scarfed them down.  But take my word for it, they were delicious!


I hope you and your family will enjoy these wholesome chips.  Yummy in yogurt, chopped into granola, stirred into oatmeal or baked into cookies or cakes, these will help you get your “apple a day”!


Wishing you and yours all of God’s blessings, good health and happy eating!


Smiles, Maria


Tomato, Sausage & Cheddar Bread Pudding

Standard

maria wolffeThis dish is absolutely delicious!  It’s a great use for day old bread, and contains ingredients that can easily be found in most home pantries.  This is great at your own dinner table, but also is a great dish to take to potlucks and picnics.  The addition of brown sugar is unusual, but serves to make the dish heartier.  This pudding is a little richer than I normally make, so if you want a lower fat version, you can substitute whole or 2% milk, reduced fat cheddar cheese and switch to turkey sausage. I, however, made the recipe just as it appears below.   Feel free to experiment as that’s half the fun of cooking!  I gave this recipe a rating of Intermediate Difficulty because of the number of ingredients and amount of chopping involved. Recipe is easily doubled and can be frozen.


Diff: Inter    Prep: 30 min

Bake: 45 min    Serves 12


Ingredients:DSC03618


3 c shredded sharp cheddar cheese (12 oz)

1 can diced tomatoes, (28 oz), drained

1 # Italian bulk sausage

4 green onions, thinly sliced

¼ c. fresh basil, minced or 1 T. dried basil

¼ c. packed brown sugar

1 t. dried oregano

1 t. garlic powder

3 cups cubed day old French bread

6 eggs

1 ½ c. heavy whipping cream

½ t. salt

½ t. pepper

½ cup grated Parmesan cheese


Directions:


  • Preheat oven to 350 degrees.

  • Cook Italian sausage, breaking meat up into small crumbles as it cooks.  When done, remove sausage, drain on paper towels and let cool.

DSC03623

  • Mince basil, green onions, set aside.

DSC03628 DSC03620

  • In a large bowl, combine the cheese, tomatoes, sausage, green onions, basil, brown sugar, spices and mix together well.

DSC03621 DSC03624 DSC03625

  • Stir in bread and mix until bread is well incorporated.

DSC03639

  • Transfer mixture to a greased 9 X 13 pan or divide evenly between two 1.5 qt. Casserole dishes (only showing one casserole dish due to space considerations).

DSC03642

  • In the same large bowl (time savings!), whisk eggs, cream, salt and pepper.

DSC03645

  • Pour mixture over bread mixture. 

DSC03647

  • Sprinkle Parmesan cheese on top.

DSC03650

  • Bake at 350 for 45-50 minutes or until a knife inserted in the center comes out clean.

DSC03655

  • Serve and enjoy!


This made my kitchen smell so good while it was cooking that I was literally salivating waiting for it to come out of the oven. 

Yes, with all those ingredients, this recipe is a bit of work, but it’s sooo delicious it’s worth all the grating and chopping it requires.  Keep this recipe in mind for your Thanksgiving or Holiday table, it’s that good!

Until next week, wishing you and yours all of God’s blessings, Good Health and Happy Eating!


Smiles, Maria

Easy Rustic Plum Tart

Standard

maria wolffeThese lovely tarts became popular a few years ago; and I have always wanted to make one.  I like them because, one, you only use one sheet of pie dough so the tart doesn’t have so many calories.  Two, I love the way the dough enfolds the fruit, almost like a hug. (We all like hugs, right?)  And three, I love the way the fruit looks peeking out from the crust, it looks so inviting you want to grab a fork and dig right in!  This is also a low fat dish because it uses only 1 egg white and 3 T. plus 1 t. of coarse sugar; so is a good choice for people that are watching their waistlines. This is a great light summer dessert for your family or even for company; all you would have to do dress it up with whipped cream.  This dessert is sure to win you oohs and ahhs from your guests!


Diff: Easy  Prep: 15 min  Bake: 20-25 min  Serves: 8


IngredientsDSC03652


Pastry for single-crust pie (9 inches

3-½ c. sliced unpeeled fresh plums

3 T + 1 t coarse sugar, divided

1 T. cornstarch

1 egg white

1 T water


Directions


  • Heat oven to 400 °.

  • Roll pastry into a 12 inch circle and transfer to a large baking sheet lined with parchment paper.

DSC03660

  • In a large bowl, combine plums, 3 T. of coarse sugar and cornstarch; mix well to coat.

DSC03661

DSC03662

  • Arrange plums in a pinwheel pattern over pastry to within 2 inches of edges.

DSC03663

  • Fold edges of pastry over plums. Beat egg white with 1 T water and brush over pastry.  Sprinkle edges with 1 t. coarse sugar.

DSC03665

DSC03664

  • Bake at 400 ° for 20-25 minutes or until crust is a light golden color.

DSC03668

  • Enjoy!


This is so incredibly easy I don’t know why I didn’t try to make one before.  Now that plums are in season, I’ll have to make another one!  The one pictured above didn’t last but a day!

I hope you’ll try to make one of these soon. They look so elegant; your guests will think you fussed for hours !  However, this is so much easier than making a regular pie, I might never go back and make another!  (NOT!)


Until next week, wishing you and yours all of God’s blessings, Good Health and Happy Eating!


Smiles, Maria


Lemony Blueberry Ricotta Poundcake

Standard

maria wolffeThis delicious pound cake was another item I made to use up the ricotta cheese I had in my refrigerator after it failed earlier this month.  I also had lots of blueberries and lemons, so I combined all three flavors, resulting in this moist and delicous cake. This would be lovely to serve as an easy dessert for informal get together’s with friends or family, or you can dress it up with whipped cream and extra blueberries to make it a little fancier for a more formal dinner. However you choose to serve it, this will keep well in your refrigerator for several weeks.

*Make sure that you have the eggs, ricotta cheese and butter at room temperature when you make this. To bring the eggs to room temperature quickly, place them in a bowl of warm water for a few minutes. The leavening in this recipe comes from the eggs and the baking powder, so make sure your baking powder is fresh (less than six months old).

Diff: Easy Prep: 20 min. Cook: 1 hr. 5 min. Serves: 10-12

Ingredients:

  • 1 ¾ c. all purpose flour – (250 g)
  • 2 t. baking powder
  • ½ t. kosher salt
  • ¾ c. unsalted butter (1 ½ sticks)
  • 1 c. ricotta cheese (8 oz./230 g)
  • 1 ½ c. sugar (300 g)
  • 3 large eggs
  • 1 t. pure vanilla extract
  • 1-4 T. lemon zest (I used 4 T.)
  • 1 cup (or more) fresh blueberries (5 oz./140 g)

Directions:

  • Preheat oven to 325 degrees F. (160 C). Prepare a 9X5 loaf pan, either spray inside with cooking spray or smear with butter.

IMG_0027

  • In medium bowl, whisk flour, baking powder and kosher salt together well.

DSC02801

  • Using an electric mixer, beat together the butter, ricotta, and sugar.

IMG_0018

  • Add eggs, one at a time, mixing on medium speed for one minute after each addition.

  • Mix in the lemon zest and vanilla extract. Don’t worry if the batter looks curdled at this point; it really isn’t!

IMG_0021

  • Stir in the dry ingredients in 3 or 4 additions to bowl of wet ingredients, until just incorporated. Do not overmix! Stir in the blueberries.

IMG_0038

IMG_0039

  • Pour the batter into the prepared loaf pan, smoothing out the top with a rubber spatula.

IMG_0040

  • Place on a baking sheet on the middle oven rack. This will regulate the temperature on the bottom of the pan.
  • Bake for 65-75 minutes, or until a toothpick inserted in the middle comes out clean. For the last 10 minutes of baking, you might want to put a sheet of aluminum foil over top of cake to prevent excessive browning.
  • Remove from oven when done and let cool 15 minutes in the pan. The run a dull knife around edge of cake to make sure it is seperated from pan. Gently remove cake and let cool completely on a wire rack before slicing.

Isn’t this one of the most cheerful pound cakes you’ve ever seen? Did I mention that a slice of this can serve as a quick breakfast when you’re on the run? (OK, I know it’s not the healthy thing to have, but …) And just try a slice it toasted in a toaster oven! Even better with just a bit of butter on it!

May you and yours enjoy some of this luscious lemony pound cake soon! Until next week, wishing you and your family all of God’s blessings, good health and happy eating!

Smiles, Maria

Sturdy Sourdough Pizza Dough

Standard

You knew I’d get back to something sourdough eventually, didn’t you?

This is my favorite sourdough pizza crust recipe. Because this is sourdough, you really shouldn’t expect it to rise much. However, the recipe does contain ½ t. of yeast, so there will be a slight rise and puffiness in the dough. If you don’t know how to make a starter, or don’t have any starter handy, please refer to the 3/27/13 post for directions.

My homemade starter is now almost a year old, and has survived up to 3 weeks of neglect and has always come back strong after a feeding or two. It is currently bubbling happily away on my kitchen counter, re-energized after being fed yet again. (Kind of like my cat, Riley). I also like this recipe because it uses bread flour, which makes for a sturdier pizza dough.

This recipe will yield enough dough for one large 14” pizza or seven miniature pizzas.

Diff: Inter   Prep: 15 min+4 hr. rise   Cook: 15–20 min   Serves: 6

Ingredients

1 cup sourdough starter, unfed, straight from fridge (great for those of us that can’t seem to plan ahead!)

½ c. warm water (110 degrees F)

1 ¼ c. all-purpose flour

1 ¼ c. bread flour

1 t. kosher salt

½ t. instant yeast (rapid rise)

Directions

  • Place sourdough starter in a large bowl.  Add warm water, flours, salt and yeast.

DSC02337

  • Stir until dough starts to come together.

DSC02343

  • Knead until just barely sticky, adding more flour if needed 1 T. at a time until dough is smooth and elastic.

DSC03527

  • Transfer dough to a greased bowl, cover with plastic wrap, and let rise until doubled in bulk. (This will take 2-4 hours).

DSC02347

  • Once dough has doubled in size, gently deflate by punching down.*

DSC02363

  • *At this point, dough can be wrapped in plastic and frozen, or put into refrigerator for use later.**

DSC03526

  • Transfer dough to a floured work surface, and roll the dough out a 14 inch circle for a large pizza. 

DSC03530

  • Or, as I did, you can remove tennis ball size pieces of dough and make miniature pizzas instead.

DSC03532

  • Before topping crust(s), pre-bake them either on a pizza stone (preheat this in oven when you set temperature) sprinkled with cornmeal or a greased sheet pan in a 500 F. oven for 7 minutes.

DSC03533

DSC03535

  • **After pre-baking, crust(s) can be frozen to be used later.

DSC03540

  • Brush crust lightly with olive oil before adding toppings. This will keep crust from getting soggy. Add sauce, cheeses and any other desired ingredients to pizza.  (Yup, that’s really a bottle of olive oil, it’s shy so it tried to hide…)

DSC03538

  • Bake at 500 F. for 10-20 minutes. At this temperature, check your pizza frequently. You can decrease the temperature and increase the amount of cooking time.  (I erred on the side of only cooking this pizza 10 minutes, so the crust isn’t very brown).


DSC03541

*Remove frozen dough from freezer the night before and let thaw in refrigerator.

**Let frozen pizza crusts thaw for an hour or two before topping and baking.

I hope you enjoy experimenting with this pizza dough, as it’s quite versatile. Thick or thin, homemade pizza is always a treat!

Until next week, wishing you all of God’s blessings, Good health and Happy Eating!

Smiles, Maria

Spicy Baked Zucchini Coins with Fresh Garden Herbs

Standard

We’re coming to the end of a long summer, and, if you’re a gardener, you know what that means! The harvest is coming in, and you’re overwhelmed by too much zucchini, too much corn and too many bushels of tomatoes. There’s so much you can do with these vegetables; you can preserve them by canning, making zucchini bread or pancakes, corn salsas, salads and soups, tomato sauces and soups, or relishes. The possibilities are only limited to your imagination! I get shivers of joy just thinking of what I can do with these ingredients!

This side-dish, vegetarian recipe is so very simple, but delicious! You can use any combination of fresh (or dried) herbs to change the taste, but I prefer fresh. Quick and easy, this will be on your table in under an hour!

Diff: Easy Prep: 10 min Cook: 35-50 min Serves: 4-6

Ingredients

2 medium zucchini

2 T. butter or olive oil

1 T. fresh oregano or 1 T. dried oregano

2 sprigs thyme (I used lemon thyme), leaves removed

2 pieces chives, chopped

2 T. fresh Italian parsley

¼  cup Parmesan or Asiago cheese, grated

Salt and Pepper


Directions

  • Preheat oven to 350 degrees F. (No pix)

  • Slice zucchini into ¼ -1/8 inch rounds (coins)

DSC03544

  • Toss zucchini with 2 T. olive oil or butter and herbs (Ok, just imagine this has the oil and herbs on it…)

DSC03548

  • Arrange in a single layer on a large baking sheet

DSC03553

  • Sprinkle parmesan or asiago cheese on top

DSC03556

  • Place in preheated oven, and bake, uncovered, for 35-40 minutes

  • Remove, season with salt and pepper and enjoy!  Serve with additional grated cheese if desired.

DSC03559

See? Wasn’t that just too easy for such a healthy and tasty side-dish?

Until next week, wishing you all of God’s blessings, Good Health and Happy Eating!

Smiles, Maria

Refreshing Cucumber Soup

Standard

This quick and easy, chilled soup is wonderful to serve on those hot, sultry summer days.  And you don’t have to heat up your kitchen when you make this; is that not cool?  Plus, it’s a wonderful way to use up the bounty from your summer garden.  I love the crispness, crunch and coolness of cucumber, which is one of my favorite vegetables!  This can serve as either a cool appetizer or a side to a spicy meal. Low Fat and Tasty, this has become a summer staple on my lunch or dinner table!  Recipe can be easily doubled.


Diff: Easy  Prep: 45 min Serves: 7


IngredientsDSC03674


1 # cucumbers, peeled, seeded and sliced

¼ t. kosher salt

1 ½ c.  fat free Greek yogurt

1 green onion, chopped

1 garlic clove, minced

4 ½ t. fresh dill, snipped

Extra chopped green onion & dill for garnishing


Directions


  • Wash, peel cucumbers.


DSC03671

  • Slice, sprinkle with salt and place in a colander over a plate to stand for 30 minutes.

DSC03672

  • Discard any liquid.

  • Rinse and pat dry.

DSC03676

  • Place yogurt, cucumber, onion and garlic in a food processor. 

DSC03677

  • Stir in dill and process until smooth.

DSC03681

  • Serve in small chilled bowls.  Garnish with additional onion or dill if desired.

DSC03683

  • Enjoy!


Now, isn’t this the most refreshing soup?  Full of veggies and yogurt, it’s heart healthy, delicious and good for you!  What a win win!


Until next week, wishing you all of God’s blessings, Good Health and Happy Eating!


Smiles, Maria

Grilled Southwestern Cilantro Lime Sweet Corn

Standard

There is probably no one vegetable that says summer quite like Corn on the Cob. fresh ear of corn simply dressed with butter and salt is a classic, late summer treat that can hardly be improved upon. But we can never leave good enough alone, right?

My husband likes corn on the cob done in the classic style, so it took a little doing to convince him to try something different. Since he loves spicy food, all I had to do was to mention southwestern, and he caved in. So, even though it was sneaky, I was able to expand our corn horizons, delicously!

Corn on the cob is so versatile, you can grill it, roast it, steam it, boil it or even (shudder!) microwave it. My personal favorite way to prepare corn on the cob is to grill it because I love the toasted way it looks, gridmarks and all!

This particular recipe has been around for years in one form or another and was popularized by food diva Martha Stewart, the Food Network, Taste of Home magazine and numerous sites on the internet.

So, before summer ends, challenge yourself to a new taste experience with corn!

Diff: Med  Prep: 35 min + soaking  Grill: 25-30 min  Serves: 8

Ingredients

8 ears corn in husks

1/3 c. + ¼ c. butter, softened & divided

3-6 T. minced fresh cilantro

1 ½ t. grated lime peel or zest

1 t. kosher salt

1 t.+ 2 T. lime fresh lime juice

½ t. garlic powder

1 t. hot red pepper flakes

Directions

  • Soak corn in cold water for one hour, try to submerge them as fully as possible, turning ears upside down after half an hour if your container is not big enough (like I had to…)

DSC03563

  • Meanwhile, heat grill to medium

  • In small bowl, combine 1/3 c. softened butter, cilantro, lime peel, salt, 1 t. lime juice and garlic powder, set aside

DSC03560

  • Remove ears from water, peel back husks to within one inch from bottom, and remove silks

DSC03566

  • Spread each ear thoroughly with butter mixture

DSC03567

  • Rewrap corn husks and tie with kitchen string

DSC03568

  • Oil heated grill racks, and grill corn, covered, for 25-30 minutes - check and turn corn every ten minutes

DSC03569

  • In a small microwave bowl, melt remaining butter and stir in 2 T. lime juice  (Oops!  No pix!)

  • When corn is done, remove, cut string and peel back husks. If desired, you can roast corn a little longer on grill to get a browned appearance.  Remove when satisfied, brush corn with butter mixture and sprinkle with red hot pepper flakes.  Serve!

DSC03572

I totally devoured my corn in under five minutes, it was that good! I loved the heat of the red pepper flakes and the coolness of the lime and cilantro. As much as I like the classic corn, this southwestern inspired recipe is a definite keeper!

Until next week, wishing you all a Safe and Happy Labor Day, all of God’s Blessings, Good Health and Happy Eating!

Smiles, Maria

Lemon Blueberry Ricotta Muffins

Standard

The breakdown of our refrigerator this month was the catalyst for this recipe, as I had to use or throw away everything in my freezer or refrigerator before it went bad. I happened to have a quart of ricotta cheese in my refrigerator, and wanted bto use it. Also, happily, I had blueberries and lemons. As the readers of this blog know, I love lemon anything, and blueberries are my favorite fruit. So combining the three was a natural.

These moist, light muffins are quick and easy to put together. The fresh lemon flavor bursts on your tongue, the blueberries are a perfect addition and the ricotta cheese gives these an extra richness that is so good. The combination of the lemon and sugar is an unusual but inspired technique and the results are totally delicious. I know I will make these muffins again and again! Yummy!

Diff: Easy  Prep: 15 min.  Cook: 18 min  Yield: 12-15 muffins

Ingredients:

  • 2 c. all purpose flour

  • ½ t. baking powder

  • ½ t. baking soda

  • ½ t. kosher salt

  • 1 c. white sugar

  • Zest from 2 lemons

  • ½ c. unsalted butter, room temperature

  • 1 c. ricotta cheese

  • 1 egg

  • 1 T. freshly squeezed lemon juice

  • 1 t. pure vanilla extract

  • 1 c. (or more) fresh blueberries

  • Turbinado Sugar – for topping

Instructions:

  • Zest two lemons.

IMG_0005

  • Combine lemon zest well with 1 cup sugar and set aside.

IMG_0006

  • Preheat oven to 350 degrees.
  • Spray a 12 cup muffin tin with Pam or paper muffin cups.
  • In medium bowl combine: flour, baking powder, baking soda, and salt. Whisk together, and set aside.

DSC02801

  • Using a mixer, beat room temperature butter and lemon zest sugar together until light and fluffy – about 2 minutes.

IMG_0018

  • Add ricotta cheese to the lemon-sugar/butter mixture and beat until smooth.

IMG_0021

  • Add egg, fresh squeezed lemon juice and vanilla and beat until fully mixed.

IMG_0020

  • Add the dry ingredients to the wet, folding in with a wooden spoon and then beat until just blended and no loose dry mix is evident.

IMG_0023

  • Using an ice cream scooper, ¼ c. measuring cup, or large spoon, fill each muffin tin about ¾ full. Press 5-7 blueberries into each cup and then swirl the batter (which should be quite thick) over the blueberries until they are covered.  Top with a generous sprinkle of the Turbinado sugar (about a tsp.).

IMG_0024

  • Bake about 18 minutes. (If tins are overfull – add 2-3 minutes)
  • Remove from oven, and cool about 5 minutes in tins, then tip muffins out and cool on wire racks. (These are best eaten warm, so they might not stay on those racks long enough to cool!)  Notice that several are missing already, and one has a bite out of it!

IMG_0026

These are MAJOR YUMMY and their bright yellow color studded with blueberries makes me smile! I could barely wait to get them out of the muffin tins before I had one; and hubby quickly made off with two more while I wasn’t looking. Great for breakfast, a snack or even dessert; I hope you and your family will enjoy these delicious muffins soon!

Until next week, wishing you all of God’s blessings, good health and happy eating!

Smiles, Maria